Apple iPhones are known for having sophisticated camera systems that allow customers to take professional-grade photos and videos. In this guide, we’ll provide you with thirteen tips and tricks for how to take the best iPhone photos.
There’s a learning curve when it comes to understanding how to use your iPhone’s camera, especially if you recently upgraded from an older model like the iPhone 7 or iPhone 8 to the iPhone 11 Pro or iPhone 12 Pro. Even if you haven’t upgraded, there are often many photo capabilities and settings you may have never used before.
Tips for Taking the Best iPhone Photos
Whether you have an older phone like the iPhone 7, iPhone 8, or iPhone X or a newer iPhone like the iPhone SE (2020), iPhone 11, or iPhone 12 Pro, these tips will help you get the most out of your iPhone camera
Use the Right Shooting Mode
On your iPhone camera app, you have plenty of shooting modes to choose from, including square, photo, panorama, and portrait (first introduced on the iPhone 7 Plus). Apple’s iOS 14 also features a new dimension, 16:9. All of these shooting modes enable you to take a photo in the mode that is compatible with the platform you plan to share it on. For example, square photos are best for Instagram since Instagram publishes photos with the same 1:1 dimension. That way, you don’t need to crop your photo afterward.


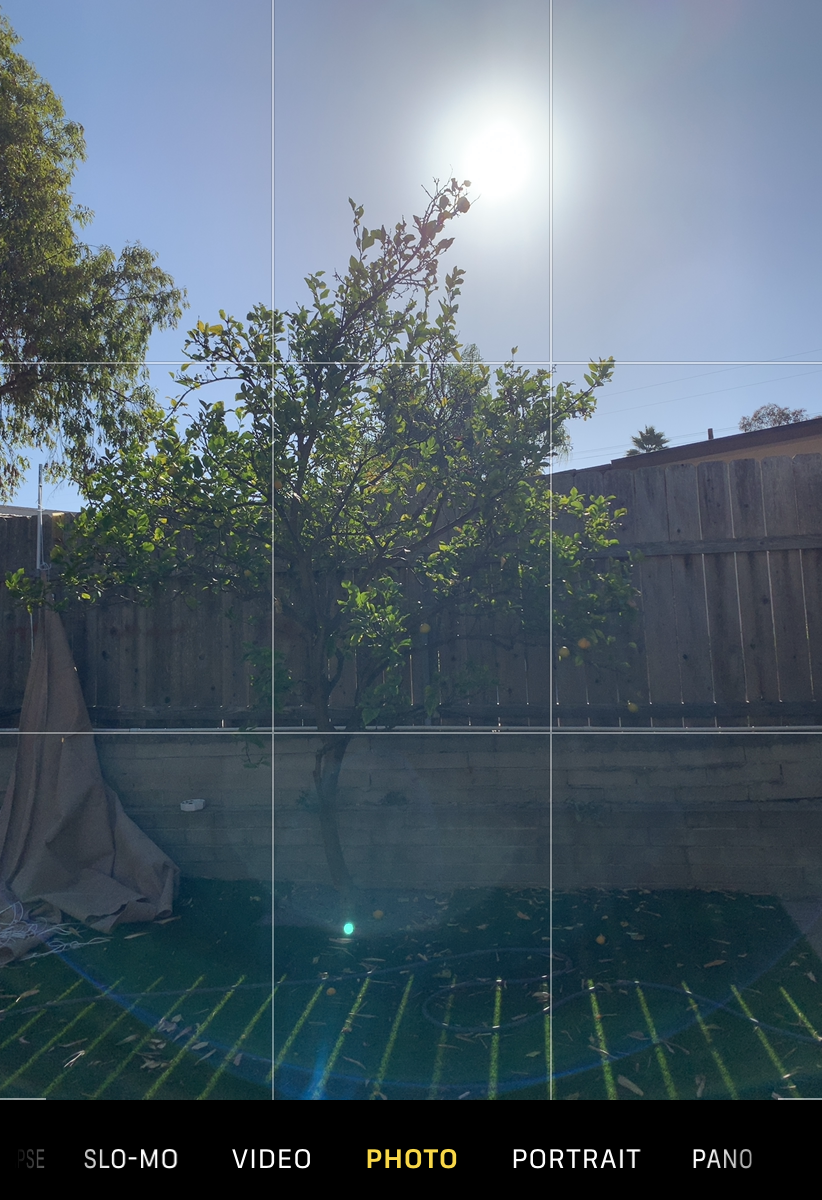
Turn on the Camera Grid
The iPhone camera includes a grid consisting of two horizontal lines and two vertical lines, splitting the screen into nine small sections, or three rows and three columns. The iPhone grid is a great way to use the “rule of thirds” to capture better photographs. The rule of thirds is a photography guideline that improves composition—photos tend to be better and more pleasing to the eye if the subject is off-center on one of the gridlines (as opposed to dead center).
You can turn on the camera grid by going to “Settings,” then “Camera,” then switching on “Grid” underneath “Composition.
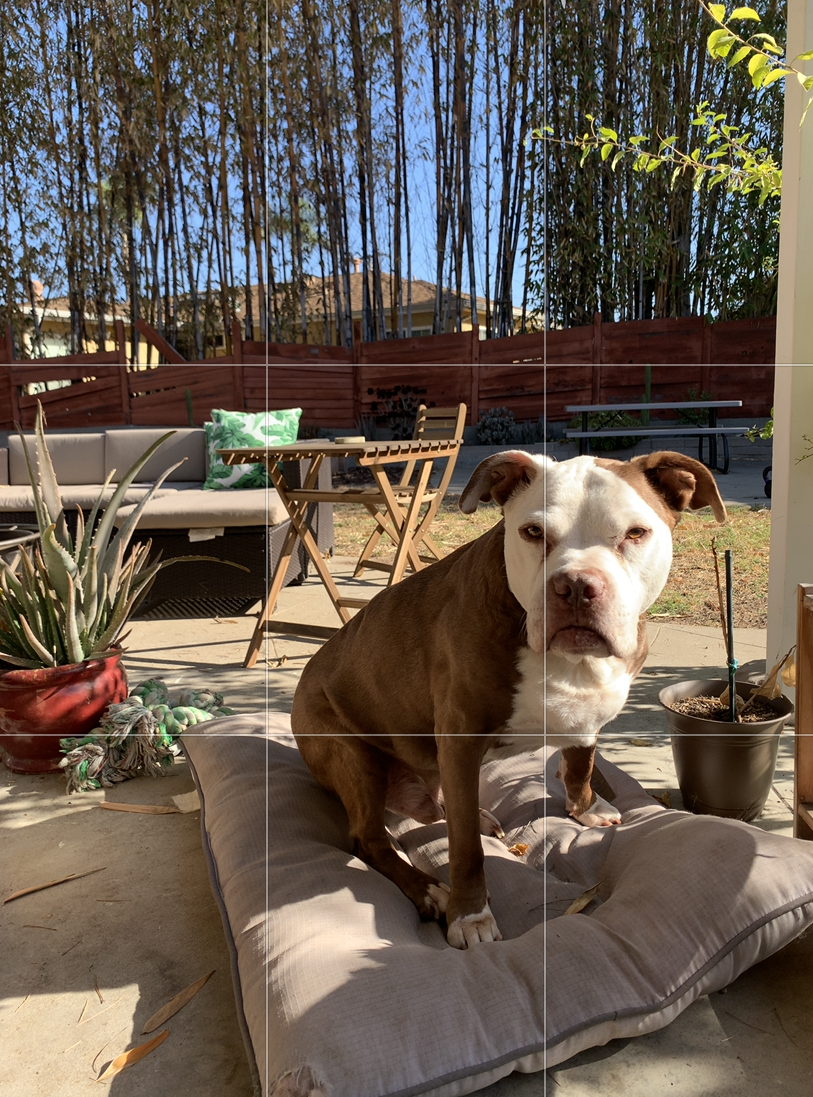
Blur Backgrounds with Portrait Mode
Portrait mode allows you to take stunning photos of people, animals, and objects while blurring the background. All you have to do is choose “Portrait” from the selection of shooting modes in your camera app, then wait for the yellow focus box to appear around the subject. To ensure high-quality portraits, stand between two and eight feet away from the subject. When Portrait mode is ready, you will see the words “Natural Light” appear (the iPhone 7 Plus will say “Depth Effect). For those using the iPhone 11 Pro series or iPhone 12 series, you can switch between Telephoto and Wide Lens within Portrait mode.
The wonders of Portrait mode don’t end with taking the photo either—afterward, you can edit the photo to strengthen or weaken the background blur. You can do this by clicking “f/number” in the upper left-hand corner in editing mode. Then drag the Depth slider left or right to adjust the blur.
Lastly, the iPhone camera includes a Portrait Lighting feature, which allows you to experiment with different studio lighting settings. Next to the “f/number” icon, you’ll see a hexagon—click that to access the Portrait Lighting feature where you can choose between several effects, including Contour Light, Stage Light, Studio Light, etc.

Use Burst Mode for Moving Subjects
Burst mode is an awesome iPhone camera setting that enables you to take ten photos per second, which allows you take photos of moving subjects, whether they’re jumping in the air, kicking a soccer ball, or running into the ocean. For the best results, use Burst mode for the duration of an action you want to capture—for instance, if you want a photo of someone doing a kick flip, begin taking the Burst shots a few moments before they attempt the trick and don’t stop until after they’ve landed it (fingers crossed!). Then you can examine the group of photos taken and find the perfect action shot within the sequence.
If you have iOS 14, you can use Burst mode via your volume up button. All you have to do is go to “Settings,” then “Camera,” then toggle on the option that says “Use Volume Up for Burst.” Now when you’re in the camera app, all you have to do is press the volume up button and you’ll be well on your way to capturing great action shots.
Try Third-Party Apps
While the iPhone camera app is plenty capable of taking superb photos, it can still be fun to play around with third-party apps, such as Camera+2, ProCamera, Obscura 2, and more. Apps like these help take your iPhone to the next level with controls such as ISO, exposure, and shutter speed. Some of them require some knowledge of photography while others will take automatic photos and allow you to work your way up to manual.
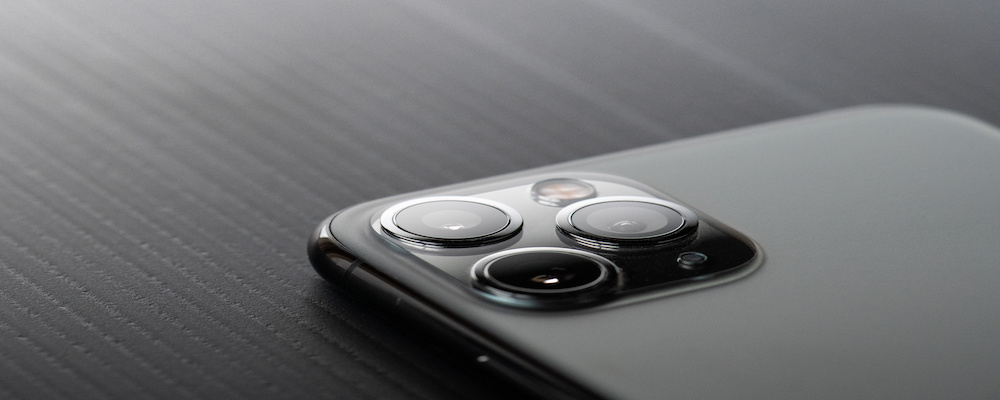
Switch Between Telephoto, Wide, and Ultra Wide Lenses
Many newer iPhones, such as the iPhone 11, 11 Pro, 11 Pro Max, and iPhone 12 series, have two or three rear-facing lenses, which you absolutely need to take advantage of. The iPhone 11 has two lenses, Wide and Ultra Wide, whereas the iPhone 11 Pro and 11 Pro Max have three lenses, Telephoto, Wide, and Ultra Wide. Likewise, the iPhone 12 has two rear lenses while the iPhone 12 Pro has three. If you’re looking to take professional-quality photos, the iPhone Pro series should be at the top of your list—check out the iPhone 11 Pro and iPhone 12 Pro to learn more about the cameras as well as other features. Carriers often offer great deals on iPhones, new and old alike, so you’ll want to stay up-to-date on all things iPhone deals.
In order to seamlessly switch back and forth between these lenses, open your camera app. Within the app, you will see Zoom icons at the bottom of the viewfinder. The 2x is the Telephoto lens, the 1x is the Wide lens, and the .5x is the Ultra Wide lens. Tap the icons to switch between these lenses with ease. The Wide lens is great for most typical shots, while the Ultra Wide lens is best for when you need to capture something like a beach or landscape or a cityscape. The Telephoto lens is your new best friend when it comes to zooming in on subjects when you can’t physically get closer to them.
Utilize Night Mode
The iPhone 11 and 12 series include a wonderful new feature, Night mode, which allows you to take beautiful photos even in low light, preserving the color and detail of your shots. Night mode turns on automatically whenever you’re in a low light setting. Just remember to use the Telephoto or Wide lens, as Night mode isn’t available on the Ultra Wide lens. When you’re in the iPhone camera app, you will see a number at the bottom of the viewfinder denoting the Auto exposure time, but you can always drag it to the right or left to manually control exposure.
Take Live Photos
Available on the iPhone 6s and newer, Live Photos is a feature that creates moving images. Think of them as photos that function as really, really short videos. They’re great for bringing beautiful photos to life. Turn on the Live Photos feature by opening the iPhone camera app then clicking on the circle in the upper right-hand corner of the screen. You will see the word “Live” appear. When you click the shutter button, the camera will save movement from 1.5 seconds before and 1.5 seconds after, creating a 3 second live photo. You can replay the Live Photo by holding down on the screen.
While you’re probably going to want the majority of your photos to be still, Live Photos is great for capturing the movement of water, the sounds of nature, or children playing.
Capture a Photo and Video at the Same Time
QuickTake is an awesome multi-tasking feature available on the iPhone 11 camera and iPhone 12 camera. It allows you to take photos and videos at the same time—instead of swapping back and forth between video and photo settings, you can record video while you’re in the photo mode. Hold down the shutter button to begin recording a video in photo mode and lift your finger to stop recording. Or if you want to keep recording without holding down the shutter button, you can slide it to the right and release it. While the video is recording, you can tap the white button to take photos as well.
Set the Focus on Your Photos
Although the iPhone camera does a great job of autofocusing on subjects, sometimes you want a little bit more control. And luckily, you can have it! All you have to do is tap the spot on the screen where you want the camera to focus and a yellow box will appear. Typically, the focal point is going to be your subject. If you’re taking a photo of a friend, for example, you’d tap on your friend’s face to ensure the camera focuses on them. Using this focus feature is particularly important for close-up photos since the closer the iPhone camera is to a subject, the shallower the depth of field.

Utilize HDR for Richer Detail
High Dynamic Range (HDR) is a great iPhone setting that will help create more detailed photos with richer color and contrast. HDR captures three photos of differing brightness levels and automatically combines them to create the best photo. It works great for outdoor photography since there is often a stark contrast between sky and terrain. You can also use HDR to photograph people when the sun or light is behind them to ensure the subject doesn’t turn out too dark.
All iPhones have an HDR feature, but the newer ones (iPhone XS and newer) have Smart HDR, which is a more advanced version, taking nine photos in less than a second and blending the best parts of each one to create the perfectly exposed photo. You can turn on Smart HDR in your iPhone camera settings. Users of older iPhone generations can turn on and off HDR by opening the iPhone camera app, tapping HDR at the top of the screen, and selecting “Auto,” “On,” or “Off.”
Set a Timer for Selfies or Group Photos
If you want to go hands-free, you can use the timer setting on the iPhone camera app to set a delay between pressing the shutter button and actually taking the photo. This can work great if you want to pose for a photo but have no one around to take it.
To turn on the timer, click the arrow at the top of the screen. Below the viewfinder, you’ll see several icons. The timer icon is the one that looks like a clock. Select the clock then choose how long of a delay you want.
Filter Your Photo
Beside the timer icon, you’ll see a filter icon, which looks like three circles, each a different shade of gray. Click the filter icon then you can scroll through the various color filters available. The filter setting is a great way to give your photo a vintage look since there are several black and white options. You can use the filter tool either within the iPhone camera app or after you’ve taken a photo in the editing setting.
Which iPhone Has the Best Camera?
The iPhone 15 Pro Max by far has the best camera. However, the iPhone 14 Pro Max and iPhone 13 Pro Max aren't far behind. Truthfully, any iPhone 15, 14, or 13 model will take outstanding pictures and videos.
Compare the Latest iPhone Models
iPhone 17e 256GB
- 6.1 inch display
- Rear Camera: 48MP
- Front Camera: 12MP
iPhone 16 128GB
- 6.1 inch display
- Rear Cameras: 48MP, 12MP
- Front Camera: 12MP
iPhone 17e 512GB
- 6.1 inch display
- Rear Camera: 48MP
- Front Camera: 12MP

iPhone 17 256GB
- 6.3 inch display
- Rear Cameras: 48MP, 48MP
- Front Camera: 18MP
iPhone Air 256GB
- 6.5 inch display
- Rear Camera: 48MP
- Front Camera: 18MP

iPhone 17 512GB
- 6.3 inch display
- Rear Cameras: 48MP, 48MP
- Front Camera: 18MP
iPhone 17 Pro 256GB
- 6.3 inch display
- Rear Cameras: 48MP, 48MP, 48MP
- Front Camera: 18MP
iPhone 17 Pro Max 256GB
- 6.9 inch display
- Rear Cameras: 48MP, 48MP, 48MP
- Front Camera: 18MP
iPhone Air 512GB
- 6.5 inch display
- Rear Camera: 48MP
- Front Camera: 18MP

iPhone 17 Pro 512GB
- 6.3 inch display
- Rear Cameras: 48MP, 48MP, 48MP
- Front Camera: 18MP
Chris Holmes
Staff Writer

Find a better phone plan
Thousands of cell phone plans unpacked. All the facts. No surprises.


.png?w=280&h=280&usm=20&usmrad=0.8&fit=crop "Best Cell Phone Deals for July 2026: Get the New iPhone 17 for Free")


")

